

Join us ![]()
![]()
![]()
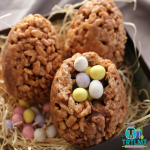
Now these have got to be one of my most favourite Easter treat to whip up and gift. They have a delicious chocolatey shell and inside is hidden goodies just like a pinata! Such a nice little surprise for the kiddies.
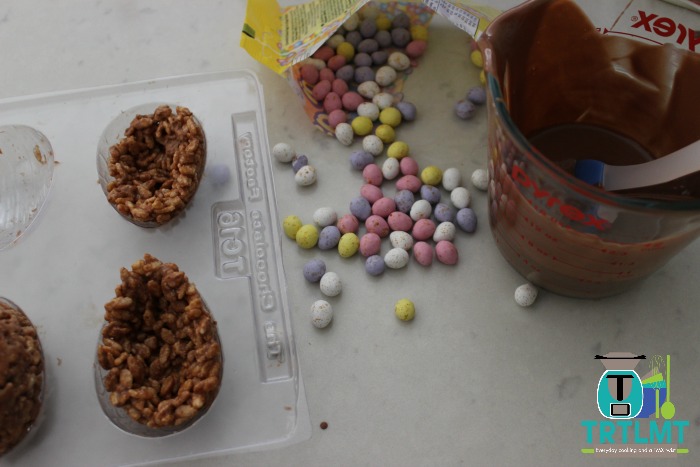
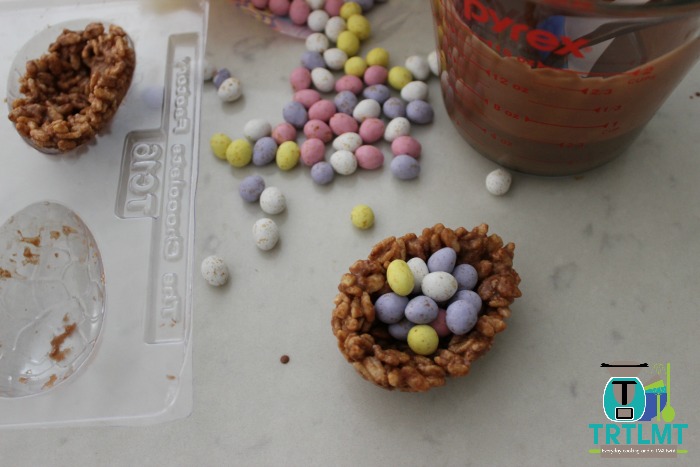
To break it down, these Mars Bar Pinata Eggs are made of a delicious Mars Bar slice-like outer layer and inside is filled with goodies, in this case little speckled mini Easter eggs. You can fill these with anything you like though such as mini jelly beans, mini chocolates, choc chips, dried fruit etc.
Wrap these in cellophane and a little ribbon for a great Easter gift!

Want more Easter recipes? My Mixing Easter e-book has 34 delicious recipes to see you through Easter and the rest of the year!
Love this recipe? Subscribe to the TRTLMT newsletter and never miss a recipe just as great as this one! Or join up to our monthly one for all the latest TRTLMT news. Subscribe to my newsletter here.
Don’t forget to hang out with TRTLMT in all the cool places! ![]()
![]()
![]()
Mars Bar Pinata Easter Eggs
- Yield: 6 1x
Description
These will keep for up to two weeks in the fridge.
Ingredients
Gather these
- 220g Mar Bar chocolates, cut into pieces
- 50g unsalted butter, cubed
- 3 cups of puffed rice cereal
- 50g melted chocolate
- 100g small candy coated chocolates
Instructions
Then cook like this
- Place mars bar pieces and butter into a microwave safe bowl. Melts on a medium heat for 1 minute.
- Stir to combine the mixture.
- Add the puffed rice cereal to the bowl and mix to coat well.
- Using a medium sized egg mould (you will need 12 holes total), place a tablespoon of mixture into the mould and work it up the sides to form a basket like shape. Repeat for the whole mixture.
- Place moulds into the fridge and allow to set for 2 hours.
- Remove moulds from the fridge and using a butter knife, carefully remove each shell from the egg moulds.
- Place some small chocolates in one half of the shell. You can pile these up slightly. This forms your “glue”.
- Spoon or pipe a little of the melted chocolate around the rim of the shell.
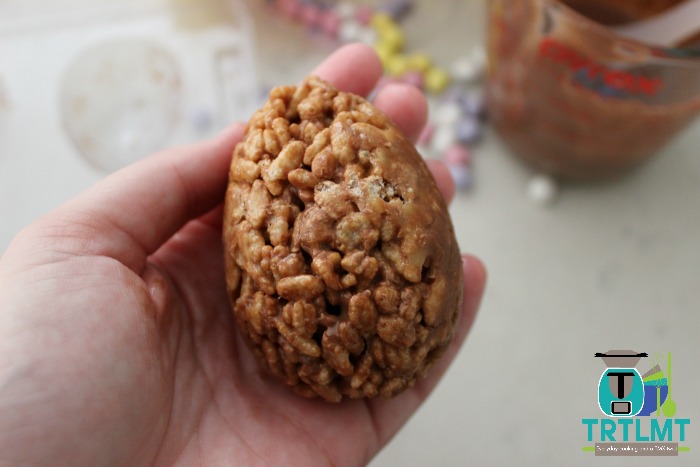
- Place another empty shell on top of this and press together gently to form an egg shape. Your warm hands will help soften it slightly and shape.
- Place into an empty egg mould and repeat for the remaining shells.
- Place into the fridge to allow the chocolate glue to set completely.
- Serve.


Omg.. Drrroooooolllllllll need to make these!