

![]()
![]()
![]()
![]()
This post contains an affiliate link.
I love experimenting with dough. With one basic recipe you can do so much. These Garlic Parmesan Twists are another one of my experiments and I must say they are sooooo delicious. They have a crunchy outer shell with a soft chewy inside full of garlic parmesan goodness.
These are a great alternative to bread for those nights you have soup or risottos. They are also yummy dipped into dips as well or simply eat on their own.
You can vary the flavours to suit your tastes. Cheese and bacon would work well or spinach and feta.
I have used Herbamare in the filling of these. It is a salt enriched with vegetables and herbs so gives it a flavour boost.
This makes 10 twists. They will keep up to three days in an airtight container and can be frozen.
If you don’t have a tmx or similar you can make the dough by hand ensuring you knead well or use a food processor or read maker. You can use a food processor or grater to make the filling component.
Read my Soft bread is possible document for lots of bread tips.

Garlic Parmesan Twists
- Total Time: 105
- Yield: 10 1x
Description
Delicious on their own, alongside soup or served with dip.
Ingredients
Dough
- 225g lukewarm water
- 375g bakers flour
- 1.5 teaspoons yeast
- ½ teaspoon of salt
- 1.5 teaspoons of bread improver, optional
Filling
- 150g cubed cheese of choice, I use a mix of tasty and parmesan
- 2 cloves of garlic, peeled
- 1.5 tablespoons of chopped parsley
- 1 teaspoon of Herbamare salt
Instructions
Dough
- Add the ingredients in this order: water, yeast, flour, improver and salt.
- Blitz on speed 7 for 6 seconds to roughly combine.
- Lock lid and use the kneading function for 6 mins.
- Remove dough and place into a lightly oiled bowl. Cover with cling film and place into a warm spot. I use the front seat of my car or a warmed oven.
- Leave this to rise for approximately one hour or until doubled.
Filling
- Place all filling ingredients into the bowl. Blitz on speed 7 for 5 secs.
Shaping
- Preheat oven to 180 degrees. Line a large baking tray with baking paper or baking mat.
- Portion dough into 10 small balls.
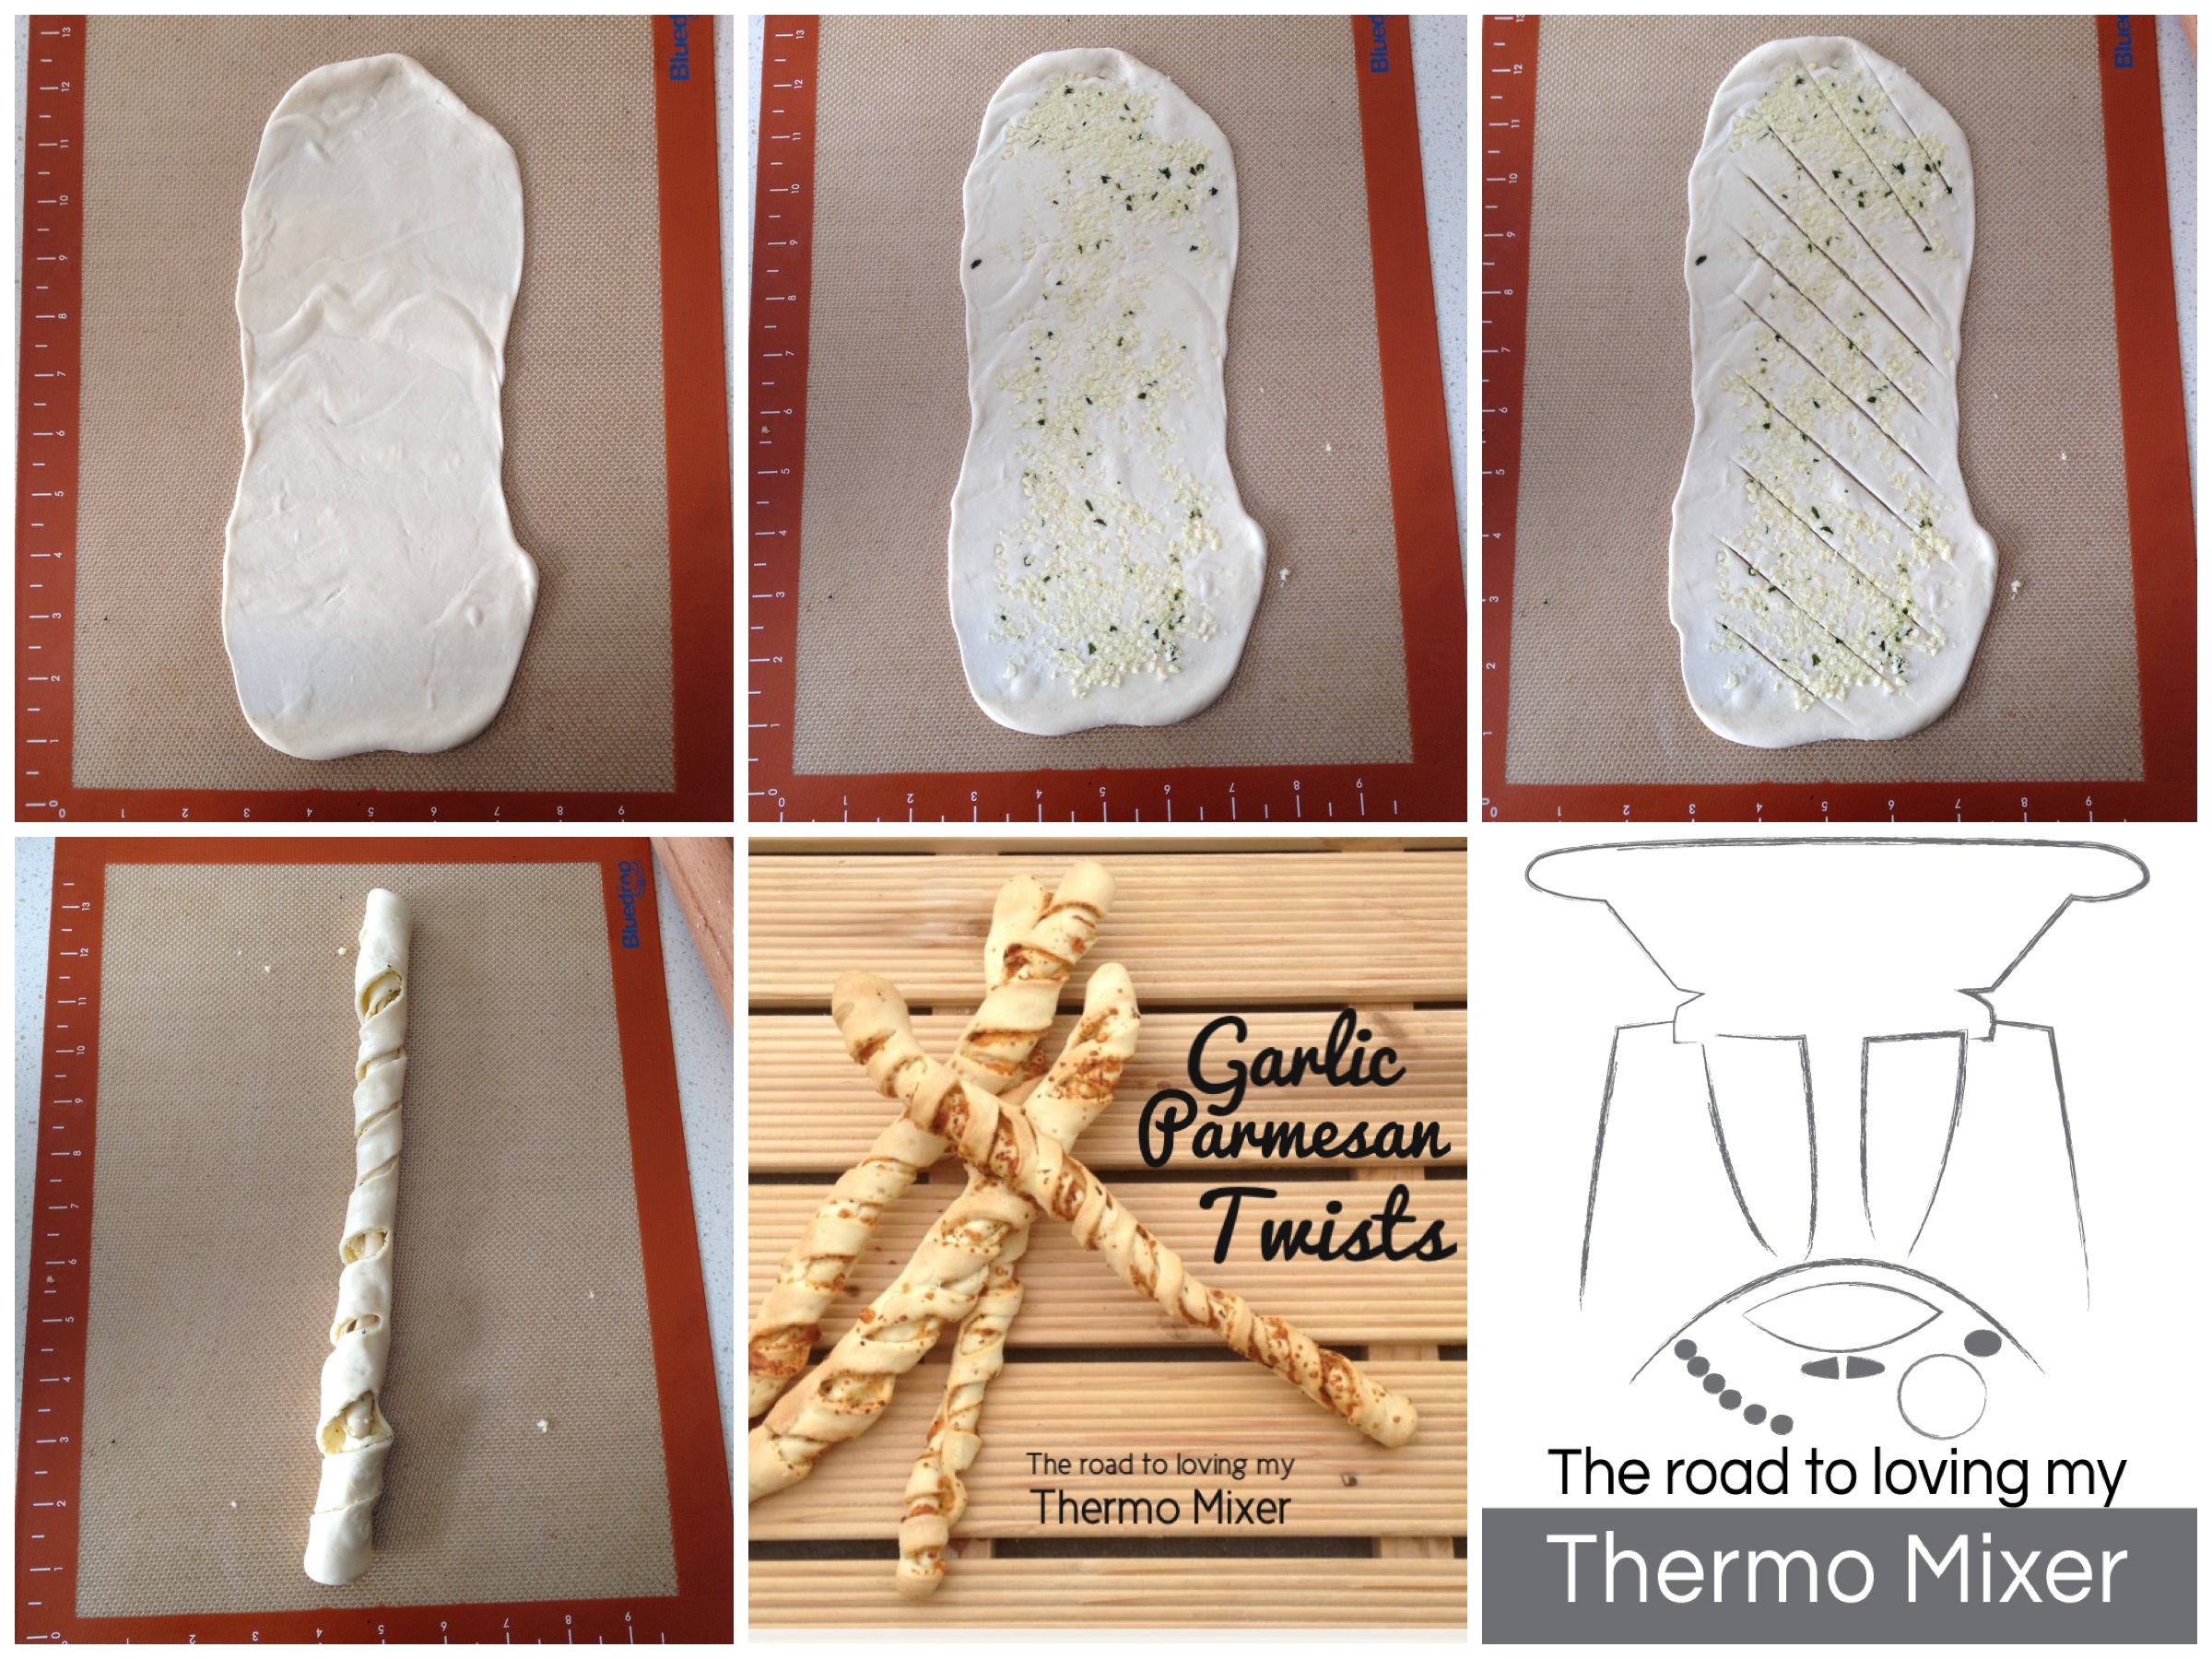
- Use the picture in the blog post as a visual guide for the next steps.
- Roll out one ball of dough into a small rectangle shape, approximately 4-5mm in thickness.
- Sprinkle over some of the filling and gently press it into the dough by rolling over it with a rolling pin.
- Using your tmx spatula or a knife (do not use a knife on silicone or baking mats) score diagonal lines across the dough as shown in the picture.
- Roll dough up loosely into a log shape as show. Do not roll up tightly or you lose the effect.
- Place on baking tray.
- Repeat for all portions of dough. Leaving a little room between each twist.
- Bake for 30-40 minutes or until golden brown.
Notes
- These will keep for up to three days in an airtight container or frozen. They are best served the day of making.
- Prep Time: 75
- Cook Time: 30